Introduction to DIY Wood Crafts
Wood crafts are a versatile and rewarding hobby. They allow you to create unique and functional items. Whether you are a beginner or an expert, working with wood offers endless possibilities. From small decorative items to large furniture pieces, wood crafting enhances creativity and skills. Let’s explore the key aspects of starting with DIY crafts with wood.
Benefits of Crafting with Wood
Crafting with wood has numerous benefits. Firstly, it is a great way to relieve stress. The process of cutting, sanding, and assembling focuses your mind and boosts relaxation. Secondly, it helps enhance your creativity. You can design and build personalized items, showcasing your style. Thirdly, wood crafting develops valuable skills. These skills include measuring, cutting, and problem-solving.
Additionally, DIY crafts with wood are often environment-friendly. You can repurpose old wood, reducing waste and promoting recycling. It’s also budget-friendly, as wood is affordable and easily available. Lastly, wood crafts make perfect gifts and decor items. They are unique, handmade, and filled with personal touch.
Choosing the Right Wood for Your Project
Choosing the right wood is crucial for the success of your project. For beginners, softwoods like pine or cedar are easier to work with. They are lightweight and affordable. Hardwood, such as oak or walnut, is ideal for more durable projects like furniture. It offers better strength but requires more effort to work with.
Also, consider the wood grain and texture. Projects requiring smooth finishes might need wood like maple or birch. For a rustic look, reclaimed or weathered wood works well. Another factor is the wood’s moisture content. Dry wood prevents cracks and warping during crafting. Always inspect wood for defects like knots or splits before starting.
Selecting the right wood ensures your project meets your expectations and lasts longer.
Essential Tools and Materials for Wood Crafts
To start with DIY crafts with wood, you need the right tools and materials. Having proper tools ensures your project runs smoothly and delivers the desired results. Beginners can start with basic tools while advanced crafters may require specialized equipment.
Basic Tools Needed for Beginners
- Measuring Tape: Precise measurements are vital for any wood project.
- Pencil and Square: Mark lines and angles clearly.
- Handsaw: Ideal for straightforward cuts.
- Sanding Block or Sandpaper: Smooth edges and surfaces.
- Clamps: Hold pieces together during cutting or gluing.
- Hammer and Nails: Join wood pieces easily.
- Drill: Useful for creating holes and assembling parts with screws.
- Wood Glue: Secure joints for lightweight projects.
Beginners should start with simple tools to gain confidence in crafting.
Advanced Tools for More Complex Projects
- Circular Saw: Excellent for fast and precise cutting.
- Jigsaw: Ideal for irregular shapes and intricate designs.
- Orbital Sander: Speeds up the sanding process for larger projects.
- Router: Perfect for detailed patterns and edges.
- Wood Chisels: For carving or shaping details in wood.
- Table Saw: Essential for cutting large wood panels.
- Wood Lathe: Used to create rounded shapes like bowls or spindles.
- Clamping System: Stabilizes wood for intricate cuts or finishes.
Advanced tools expand your options, allowing you to create complex woodcraft projects.
Selecting the right tools, based on your project and skill level, ensures efficient crafting.
Simple DIY Wood Craft Projects for Beginners
Starting with simple DIY crafts with wood projects is ideal for beginners. These projects are easy and require basic tools and materials. They build confidence and creativity while offering practical and decorative results. Here are three beginner-friendly ideas to try.
Wooden Photo Frames
Wooden photo frames are simple and fun to create. Start by cutting wood pieces to your desired frame size. Use sandpaper to smooth the edges for a polished look. Assemble the frame pieces using nails or wood glue. You can paint or stain the wood to match your home decor. Adding decorative carvings or engravings makes your frame unique. Wooden frames make thoughtful gifts and preserve cherished memories.
Decorative Wooden Coasters
Wooden coasters are perfect for protecting surfaces and adding charm to your table. Choose small pieces of wood or repurpose leftover scraps. Sand the wood for a smooth finish. You can cut them into round, square, or custom shapes. Use paint or wood stain to add personality to the coasters. Seal them with a protective finish to ensure durability. Decorative wooden coasters are practical and easy to customize.
Wooden Plant Holders
Wooden plant holders are great for indoor or outdoor decor. Start by measuring and cutting wood pieces for the base and sides. Assemble the holder using nails or screws. Sand the edges for a neat look, and apply paint or stain for style. You can also carve designs or add handles for functionality. Wooden plant holders are eco-friendly and enhance your space beautifully.
Intermediate Level Wood Craft Ideas
Once you’ve mastered beginner DIY crafts with wood, it’s time to explore intermediate projects. These ideas challenge your skills and creativity, helping you achieve more sophisticated designs. Let’s dive into projects that are functional and visually appealing.
DIY Wooden Shelves
DIY wooden shelves are stylish and practical for any space. Begin by selecting quality wood suited for your shelf’s purpose. Cut wood pieces to your desired shelf dimensions. Sand the edges for smoothness and precision. Assemble the shelf using screws or brackets for stability.
Add a finish, such as paint or wood stain, for a polished appeal. You can try floating shelves or corner shelves to optimize space. Shelves are perfect for holding books, decor, or organizing items. This project improves both your skills and your home’s utility.
Rustic Wooden Signs
Rustic wooden signs add charm and personality to any room. Use reclaimed or weathered wood for a natural look. Sand the surface lightly to remove debris without erasing the rustic vibe. Choose a message or design, and use stencils or freehand painting for personalization.
You can also engrave words using wood-burning tools. Seal the sign with a protective finish to enhance durability. Hang your sign using sturdy hooks or nails. Rustic signs are excellent for decorating kitchens, gardens, or events and can be gifted as handmade treasures.
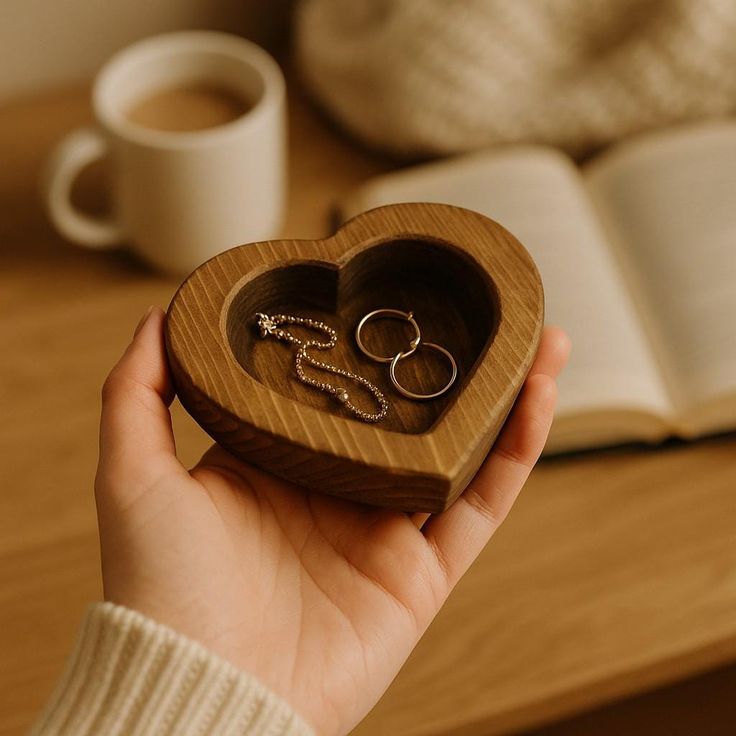
Custom Wooden Jewelry Boxes
Create custom wooden jewelry boxes to store and display accessories beautifully. Start by cutting wood pieces for the base, sides, and lid. Assemble them using wood glue and small nails for strength. Sand edges and surfaces for a refined appearance.
Add dividers inside the box to organize space for rings, earrings, and bracelets. Decorate the exterior with paint, stain, or carvings. Consider adding a lock for security or a velvet lining for elegance. Custom jewelry boxes are practical and make memorable gifts or personal keepsakes.
Advanced Wood Craft Projects
Once you’ve gained confidence in DIY crafts with wood, advanced projects offer bigger creative challenges. These projects often require precision, intricate designs, and specialized tools. Let’s delve into three impressive ideas ideal for experienced crafters.
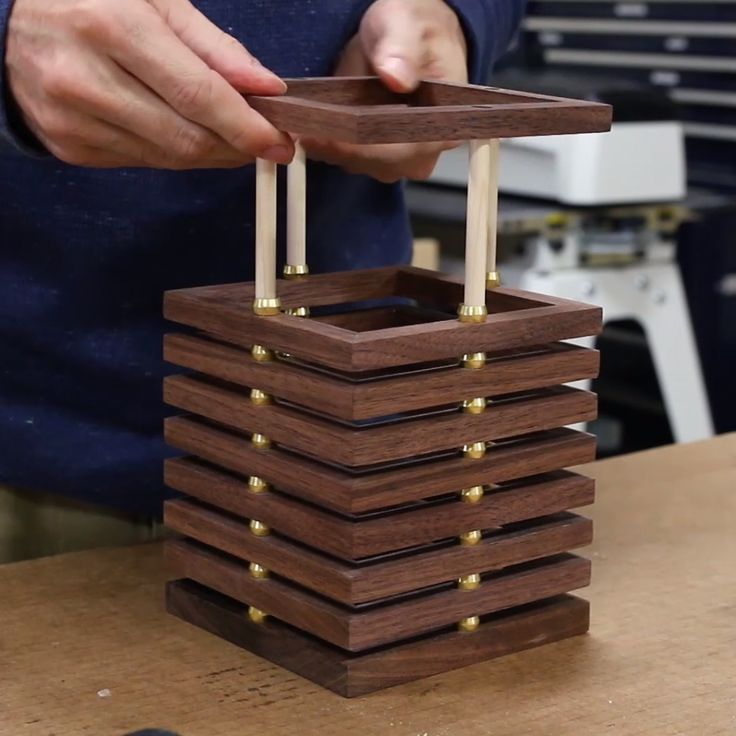
Handmade Wooden Furniture
Handmade wooden furniture combines functionality with creative design. Start by choosing durable hardwoods, like oak or walnut. Plan and sketch your desired furniture layout carefully. Cut the wood to size using a table saw for accuracy. Sand each piece for smoothness and ensure measurements are correct. Assemble the pieces with screws or dowels for support.
Add decorative touches, such as carvings or etching, to enhance uniqueness. Finish with wood stain or varnish for protection and style. Handmade furniture, like coffee tables or chairs, provides utility and showcases your craftsmanship.
Intricate Wooden Sculptures
Wooden sculptures allow you to express artistic creativity. Choose softwoods like basswood or balsa for easier carving. Use advanced tools such as wood chisels or rotary tools for detailed work. Start by outlining the design shape on the block of wood.
Gradually carve out intricate details using chisels and sandpaper. Incorporate patterns, textures, or layers for added depth. Precise sanding gives the sculpture a refined finish. Apply paint, varnish, or clear coating to preserve your work. These sculptures can serve as unique decor items or personal art pieces.
Carved Wooden Home Accents
Carved wooden accents elevate the aesthetic of any home. Choose wood types like birch or maple for smoother carving. Sketch your design, including patterns or shapes, onto the wood surface. Use routing tools or wood-burning kits for detailed accents.
Common projects include door signs, wall plaques, or decorative panels. Sand the carved surfaces and apply paint or stain matching your home decor. Seal these accents with a protective finish to prevent wear and tear. Carved accents blend functionality and artistry, making spaces visually appealing.
Advanced wood craft projects challenge your skills and creativity while creating timeless handmade pieces.
Tips for Working with Wooden Materials
Learning how to handle wood effectively is vital for successful DIY crafts with wood. Proper techniques can improve your project’s quality and durability. Here are essential tips to enhance your woodworking skills.
How to Sand and Finish Wood Properly
- Start with Coarse Sandpaper: Use 60-80 grit sandpaper to remove rough surfaces or imperfections.
- Switch to Fine Sandpaper: Move to 120-220 grit for smooth finishing. Ensure even sanding for professional results.
- Go with the Grain: Sand in the direction of the wood grain to avoid scratches.
- Clean the Surface: Use a damp cloth or vacuum to remove dust before applying any finishes.
- Apply the Finish with Care: Use a brush, sponge, or cloth to apply paints, varnishes, or oils evenly.
- Use Multiple Coats: Let the first coat dry before sanding lightly and adding additional coats.
Proper sanding and finishing ensure your wood craft feels polished and lasts longer.
Techniques for Painting and Staining Wood
- Prepare the Surface: Sand the wood thoroughly and clean it to remove any dust or grease.
- Use Primer for Painting: Apply a wood primer to ensure the paint adheres well and lasts longer.
- Choose the Right Paint: For indoor projects, use acrylic or latex paint. Outdoor projects need weather-resistant paint.
- Apply Thin Layers: Use thin, even coats for better results. Allow drying between coats.
- Choose the Right Stain: Wood stains highlight the grain. Use oil-based stains for deep colors and finishes.
- Seal for Protection: Apply a clear varnish or polyurethane coat to make the surface durable.
These techniques help add vibrant color or natural elegance to your wood projects.
Joining and Assembly Tips for DIY Projects
- Plan Your Assembly: Measure and mark joints before cutting or drilling to ensure precision.
- Choose the Right Fasteners: Use nails, screws, or dowels depending on the strength and purpose required.
- Use Wood Glue: For added durability, apply wood glue to joints before joining pieces.
- Clamp for Stability: Use clamps to hold pieces firmly until the glue or fastener sets.
- Drill Pilot Holes: Prevent wood splitting by drilling small pilot holes before inserting screws.
- Test Fit Before Assembly: Dry fit pieces to ensure proper alignment and adjustments before final assembly.
Following these tips ensures your wood projects are sturdy and professional-looking.

Creative Ways to Personalize Wood Crafts
Personalizing DIY crafts with wood makes your projects unique and memorable. Adding special touches enhances their beauty and value. Let’s explore two creative ways to give your creations a personal flair.
Adding Engravings and Carvings
Engravings and carvings make wood pieces stand out. Here are steps to add intricate designs:
- Plan Your Design: Sketch your pattern or message on paper before starting.
- Choose the Right Tools: Use chisels, wood-burning kits, or rotary tools for detailed work.
- Mark Your Surface: Trace your design onto the wood with a pencil or stencil.
- Carve with Precision: Carve slowly, following your marks to avoid mistakes.
- Sand for Smoothness: Sand the carved areas to remove debris and refine edges.
- Add a Finish: Apply paint or stain to deepen the design and protect the wood.
Engravings and carvings add depth and personality to your wood crafts. They work well for signs, boxes, or decorative panels.
Combining Wood with Other Materials
Mixing wood with other materials creates striking and modern designs. Here’s how to make combinations:
- Select Complementary Materials: Use glass, metal, fabric, or resin for contrast and variety.
- Plan the Assembly: Design how materials will fit together for a cohesive look.
- Secure Properly: Use screws, glue, or brackets to attach materials firmly.
- Decorate Thoughtfully: Paint or stain wood to match the colors of other materials.
- Experiment Creatively: Try ideas like wood with glass tops, metal handles, or fabric linings.
Combining materials elevates wood crafting to create stylish furniture or decor. It merges form with function effectively.
Personalizing wood crafts boosts creativity and delivers eye-catching results that reflect your unique style.
Sustainable Practices for DIY Wood Crafts
Sustainability is important when DIY crafts with wood. Adopting eco-friendly methods can reduce waste and protect the environment. Let’s explore two practices to make your wood projects more sustainable.
Using Recycled Wood
Recycled wood is excellent for sustainable crafting. Here’s how to use it effectively:
- Source Locally: Find old furniture, pallets, or construction scraps nearby.
- Inspect Wood Quality: Check for damage, rot, or pests before using recycled pieces.
- Clean Thoroughly: Sand off dirt, paint, or varnish for a fresh crafting surface.
- Cut Smartly: Plan measurements to minimize waste during cutting.
- Embrace Imperfections: Highlight unique grains, textures, or markings for a rustic effect.
- Repurpose Unused Pieces: Save leftover scraps for smaller projects, like coasters or decorations.
Using recycled wood reduces waste and conserves natural resources while creating eco-friendly crafts.
Eco-Friendly Finishing Options
Choose finishes that are safe for the environment and enhance your DIY crafts with wood. Here’s how:
- Opt for Water-Based Finishes: Use water-based stains or paints that have fewer harmful chemicals.
- Avoid VOCs: Select finishes labeled low or zero in volatile organic compounds.
- Try Natural Oils: Use alternatives like linseed, tung, or walnut oil for an eco-friendly coating.
- Use Homemade Sealers: Make sealers with beeswax and olive oil for a non-toxic option.
- Recycle Brushes or Cloths: Reduce waste by cleaning and reusing finishing tools.
Eco-friendly finishes protect your project while keeping it safe for the environment.
By integrating these sustainable practices, you can craft beautiful and responsible wood projects.